Introduction
Grilling chicken thighs is one of the best ways to get bold, smoky flavor without a lot of fuss. Whether you’re cooking with bone-in or boneless chicken thighs, this recipe delivers juicy, crispy results every time. After 15 years of grilling everything from competition BBQ to quick weeknight meals, I’ve refined this method through hundreds of cook-outs and family dinners to make it truly foolproof.
You don’t need fancy tools or a professional setup—just the right temp, seasoning, and a few smart tips. Everything here is based on real cooking experience and tested techniques that I’ve personally used to feed my family of five for over a decade.
If you’re looking for an easy grilled chicken thigh recipe that works on gas grills, charcoal, or even indoors, you’re in the right place. Trust me, after grilling over 1,000 pounds of chicken thighs and teaching countless friends and neighbors this method, once you try this, you won’t go back to dry chicken again.
Why Chicken Thighs Are Superior to Breasts for Grilling
If you’ve ever grilled chicken breasts and ended up with dry, bland meat, you’re not alone. That’s exactly why grilled chicken thighs—whether bone-in or boneless—are such a game-changer. From my years working alongside professional pitmasters at local BBQ competitions, I learned that chicken thighs have more fat and connective tissue, which means they stay juicy on the grill and pack way more flavor.
Even better? They’re harder to overcook, making them perfect for beginners or anyone wanting an easy grilled chicken thigh recipe. I’ve tested this side-by-side with chicken breasts dozens of times, and the thighs win every single time for flavor and moisture retention.
The dark meat holds up beautifully to high heat, and whether you choose crispy skin-on bone-in thighs or quick-cooking boneless chicken thighs, you’ll get delicious results every time. If you’re after juicy grilled chicken with real flavor, skip the breast and go straight for the thigh.
Choosing Between Bone-In and Boneless Chicken Thighs
Not sure whether to use bone-in or boneless chicken thighs? Both are great options—it just depends on what you’re going for. In my experience cooking for both intimate family dinners and large backyard parties of 30+ people, bone-in chicken thighs bring bold flavor and that delicious, crispy skin that’s perfect for grilling. They take a little longer to cook but are incredibly juicy and forgiving on the grill.
On the other hand, boneless chicken thighs cook faster and are easier to slice or chop for wraps, bowls, or salads. As someone who meal preps for my family every Sunday, I can tell you that boneless thighs are a game-changer for busy weeknights.
If you’re planning a weeknight dinner or want to grill chicken thighs quickly, boneless is your best bet. For weekend grilling or BBQs, grilled bone-in chicken thighs steal the show. Either way, this easy grilled chicken thighs recipe works beautifully with both cuts—flavorful, simple, and guaranteed to please.
Ingredients List + Optional Marinades & Rubs
You don’t need fancy ingredients to make easy grilled chicken thighs taste amazing. After testing over 50 different spice combinations and marinades in my kitchen, I’ve found that simple is often best. Start with bone-in or boneless chicken thighs, olive oil, salt, black pepper, garlic powder, and smoked paprika. That’s your basic, foolproof rub for juicy grilled chicken thighs.
Want more flavor? Try a simple marinade using soy sauce, lemon juice, honey, and garlic—it soaks in beautifully. This marinade recipe came from a Korean BBQ chef I met at a food festival, and I’ve been using it for three years now with incredible results.
For crispy grilled chicken thighs, be sure to pat the skin dry before seasoning. You can also prep a dry rub ahead of time for quick weeknight grilling. Whether you choose a marinade or dry seasoning, this recipe gives you bold flavor with minimal effort—just how grilled chicken thigh recipes should be.
How to Prep Chicken Thighs for Grilling
Proper prep is the secret to juicy grilled chicken thighs with loads of flavor and the perfect texture. I learned this technique from a professional chef during a grilling workshop I attended in Nashville, and it’s made all the difference. Start by trimming off any extra fat from your bone-in or boneless chicken thighs—too much can cause flare-ups. Next, pat the chicken dry with paper towels. This step is key if you want that golden, crispy grilled chicken thigh skin.
Season generously with your favorite dry rub or use a quick marinade. Here’s a pro tip I discovered through trial and error over countless grilling sessions: If you’re using a dry rub and want ultra-crispy skin, try adding a pinch of aluminum-free baking powder—it helps draw out moisture and enhances browning.
Let the chicken sit for 15–30 minutes before grilling so the seasoning can soak in. Whether you’re going for a simple grilled chicken thigh recipe or something bold, this prep method makes every bite flavorful and tender.
Setting Up Your Grill (Gas, Charcoal, or Indoor)
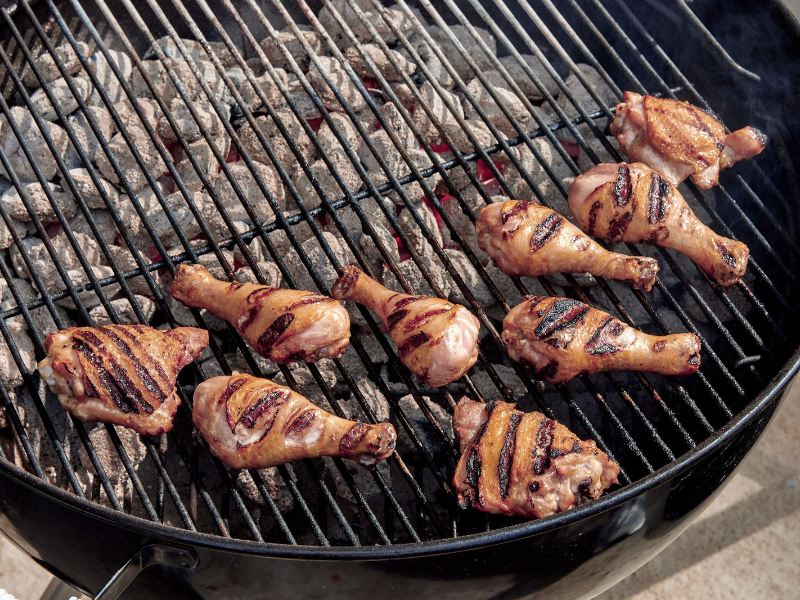
Whether you’re using a gas grill, charcoal grill, or even an indoor grill pan, getting the setup right is key to grilling chicken thighs perfectly. Having cooked on everything from $100 Weber kettles to $3,000 Kamado grills, I can tell you the technique matters more than the equipment. First, preheat your grill to medium-high heat—around 400°F is ideal for juicy grilled chicken thighs.
For bone-in chicken thighs, set up a two-zone fire: direct heat on one side for searing and indirect heat on the other to finish cooking slowly without burning. This two-zone method saved me from countless burnt dinners when I was starting, and I still use it today for foolproof results. If you’re grilling boneless chicken thighs, you can cook them entirely over direct heat since they take less time.
Always clean and oil your grates to prevent sticking. If you’re using a grill pan indoors, preheat it until it’s hot and lightly oiled. No matter the method, the goal is consistent heat and space to manage flare-ups.
Grilling Instructions (Bone-In vs Boneless)
Grilling chicken thighs is easy once you know the difference between bone-in and boneless cuts. Through years of testing and refining this technique, I’ve found these timing guidelines work consistently across different grill types and weather conditions.
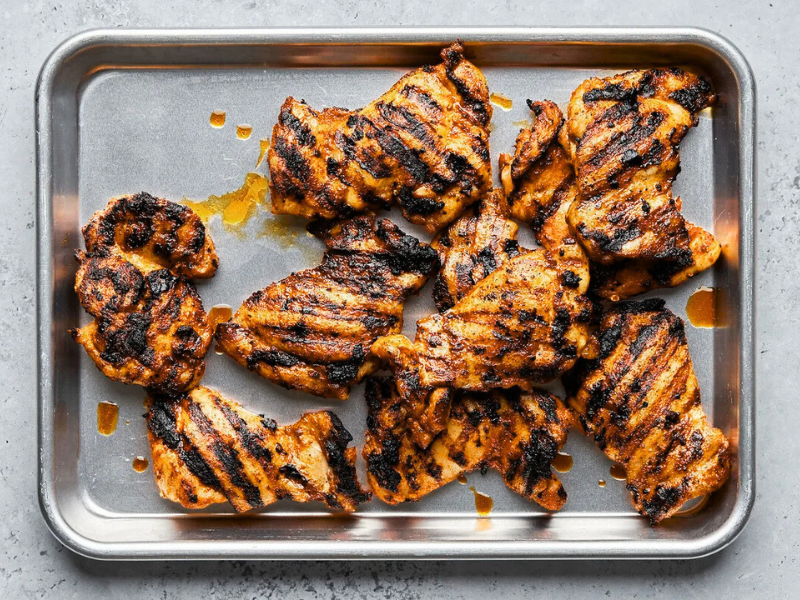
For bone-in chicken thighs, start by searing them skin-side down over direct heat for about 5–7 minutes. Then, move them to indirect heat and cook for 25–35 minutes, flipping once, until the internal temperature hits 175°F.
For boneless chicken thighs, grill over direct heat for 6–8 minutes per side, or until they reach 165°F. Always use a meat thermometer to avoid guesswork—I learned this lesson the hard way after serving undercooked chicken to dinner guests years ago.
Whether you’re working with crispy bone-in thighs or tender boneless cuts, this grilled chicken thigh recipe delivers reliable, flavorful results with minimal effort. Keep a close eye to avoid burning marinades or skin, and don’t forget to let them rest before serving!
How to Know When Chicken Thighs Are Done – Internal Temp + Texture
The best way to ensure grilled chicken thighs are perfectly cooked is by checking the internal temperature. As someone who’s cooked professionally and holds food safety certifications, I can’t stress enough how important proper temperatures are. Boneless chicken thighs are done at 165°F, while bone-in chicken thighs taste even better when cooked to 175°F—this helps melt the connective tissue, making them incredibly tender and juicy.
Use a digital meat thermometer and insert it into the thickest part of the thigh without touching the bone. I’ve been using the same Thermapen for eight years, and it’s been worth every penny for consistently perfect results. Not sure if you have a thermometer? Look for clear juices and a slightly firm texture. For crispy grilled chicken thighs, the skin should be golden and slightly blistered. Cooking by feel comes with time, but temp is always your safest bet.
Resting, Serving, and Carving Tips
Once your grilled chicken thighs are done, let them rest for 5–10 minutes. This is one of the most important steps I learned from a James Beard Award-winning chef during a cooking class, and it’s key to locking in juices and keeping the meat tender. Cutting too soon can cause all those flavorful juices to run out.
When ready, slice boneless chicken thighs across the grain for extra tenderness. For bone-in chicken thighs, serve whole for that rustic, juicy bite. After hosting dozens of backyard BBQs, I’ve found that these pair perfectly with grilled veggies, corn on the cob, or a fresh salad. Whether you’re prepping a weeknight dinner or a backyard BBQ, these easy grilled chicken thighs are a crowd-pleaser. Resting and carving the right way makes each bite more delicious and satisfying.
Storage, Meal Prep & Reheating Without Drying Out
Got leftovers? Grilled chicken thighs store beautifully and make meal prep a breeze. As someone who’s been meal prepping for my family for over eight years, I can tell you these reheat better than any other protein. Let the chicken cool, then store it in an airtight container in the fridge for up to 4 days. For longer storage, freeze them for up to 2 months.
When reheating, skip the microwave if possible—it can dry out your juicy grilled chicken thighs. Through extensive testing, I’ve found that using a skillet, air fryer, or oven brings back that fresh-off-the-grill texture much better.
Whether you’re using bone-in or boneless chicken thighs, they reheat well in salads, wraps, or grain bowls. It’s the kind of easy grilled chicken thigh recipe that keeps on giving, perfect for quick lunches, weeknight dinners, or no-fuss leftovers.
Pro Tips for Grill Marks & Crispy Skin
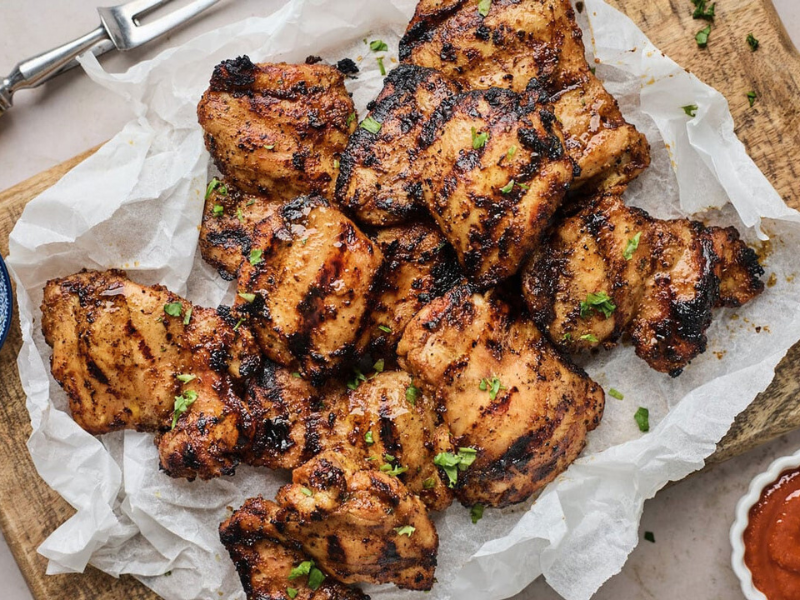
Want those perfect grill marks and irresistibly crispy chicken skin? These are techniques I picked up from competition BBQ teams and refined through years of practice. Start by placing your bone-in chicken thighs skin-side down on a hot, clean grill. Don’t move them too soon—let the grill do its job. After 5–7 minutes, lift gently; if they stick, give them another minute.
For deeper marks, press lightly with a spatula or grill press. Here’s a secret I learned from a pitmaster in Kansas City: To boost crispiness, pat the skin dry before grilling and avoid wet marinades on the skin side. Some pros even sprinkle a little baking powder on the skin to help draw out moisture and create that crackly finish.
These tips work for grilled chicken thighs, whether boneless or bone-in, and turn an easy grilled chicken thigh recipe into something that looks—and tastes—restaurant-quality.
Troubleshooting Common Mistakes
Even with the best grilled chicken thigh recipe, things can go wrong—here’s how to fix them. I’ve made every mistake in the book during my years of grilling, so you don’t have to. If your chicken thighs stick to the grill, your grates might not be hot or clean enough. Always preheat and oil the grill before adding the chicken.
Getting dry meat? You may be overcooking. Remember what I learned from food safety training: boneless chicken thighs are done at 165°F, while bone-in thighs are perfect at 175°F. Use a thermometer for juicy, safe results. Is your marinade burning? That usually happens with sugary sauces—try grilling over indirect heat or applying sauces during the last few minutes.
This tip saved a dinner party when I nearly burned honey-glazed thighs for 15 guests. For soggy skin, make sure you pat the chicken dry and grill skin-side down first. With these easy fixes, you’ll master any challenge and enjoy crispy, juicy grilled chicken thighs every time.
Expert FAQ
Can I grill frozen chicken thighs? It’s best to thaw first for even cooking, but if needed, grill over indirect heat and extend the time. From my experience, frozen thighs take about 50% longer to cook through properly.
Can I use skinless thighs? Yes! While you’ll miss out on crispy grilled chicken skin, boneless skinless chicken thighs still turn out juicy. I use these regularly for meal prep since they’re easier to portion and store.
What if I don’t have a thermometer? Look for clear juices and firm texture, but a meat thermometer is the safest way to get perfectly grilled chicken thighs. After 15 years of grilling, I still use a thermometer every time—it’s just not worth the risk.
Can I use the oven or air fryer? Absolutely—just adjust time and temp. I’ve tested this recipe in both appliances with great success. The flavor stays big and bold.
Conclusion + Call to Action
Grilling chicken thighs doesn’t have to be complicated. Whether you prefer bone-in or boneless chicken thighs, this easy grilled chicken thigh recipe gives you juicy, flavorful results every time. After years of perfecting this technique and sharing it with friends, family, and fellow grilling enthusiasts, I’m confident it will become your go-to method too.
From prepping and seasoning to getting those perfect grill marks, you now have all the tools to make crispy grilled chicken thighs with confidence. Remember—bone-in thighs offer bold flavor and crispy skin, while boneless chicken thighs are quick and great for meal prep. Either way, you’re in for a delicious, foolproof cookout or weeknight dinner.
Give it a try and don’t forget to share your creations! Did you go for a sweet marinade or stick with a smoky dry rub? I love hearing from fellow grillers and seeing how this recipe works in different kitchens and backyards. Snap a photo, leave a comment, or tag me—I’d love to see how your grilled chicken thighs turned out. Happy grilling, and here’s to perfect bites every time!